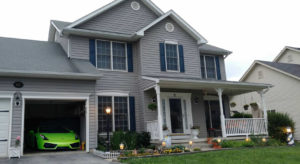
It was an early summer morning when we got several miles on the highway, all joy and ready for a long deserved family road trip to the open ocean. Then it suddenly dawned me like a hot wrecking ball: “OHHH god! Did I ever close the garage door honey??”
 …And my wife’s mouth just dropped. Like that day when I photoshopped a green lambo into our garage and facetimed her to say that I had to cash out our retirement savings for the down payment.
But I digress. Turned out, because I had our truck backed in the driveway for loading and all of us were too excited for the trip, nobody remembers clearly whether I closed it or not after we left. Happens to anyone at least 263 times right?
Fortunately, as we backtracked just 26 miles home we saw that the garage door was completely SHUT. Secured. Cerrada. Knew it. I totally predicted that, just like how Donald Trump saw the pandemic coming.
On another note, I have to find a way to stop this from happening again or I’m really pushing this marriage.
In this day and age of home automation, nearly everything in the house gets to have a mind of its own –alexa voice controlled color changing light bulbs, smart cooker, smart oven, wifi connected robot vacuum that auto charges and auto cleans, diy smart security system and a few decepticon stuffs that spy on you, etc… It’d be ashamed if we can’t simply control the garage door with our smartphone. So, there are couple ways to do this.
You can either replace the entire garage opener unit with the latest smartest model which costs hundreds for materials and labor time, or diy installing an add-on adapter that will turn your dummy garage opener unit to a slightly more gifted one –which costs only about $50.
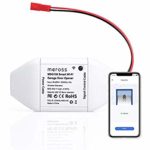
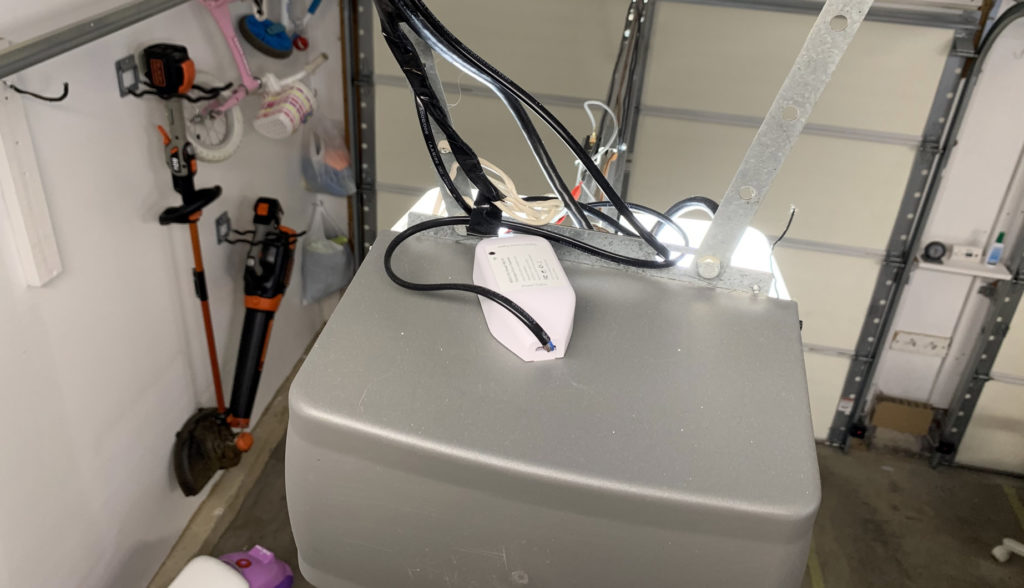
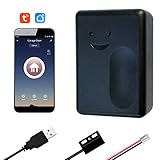
Since there is nothing wrong with my garage opener, I decidedly opted for the second option and haven’t looked back. I got myself a smart wifi garage adapter by Meross that piggybacks on my main garage door opener unit.
The installation was a slight breeze with a difficulty rating of 2.17/5. It may get a little scary towards the last steps, but folks, I assure you nothing a philip screwdriver and duct tape can’t fix. Probably…
Now before we’re going anywhere further, here’s a quick video of the endgame after the adapter was successfully put into place.
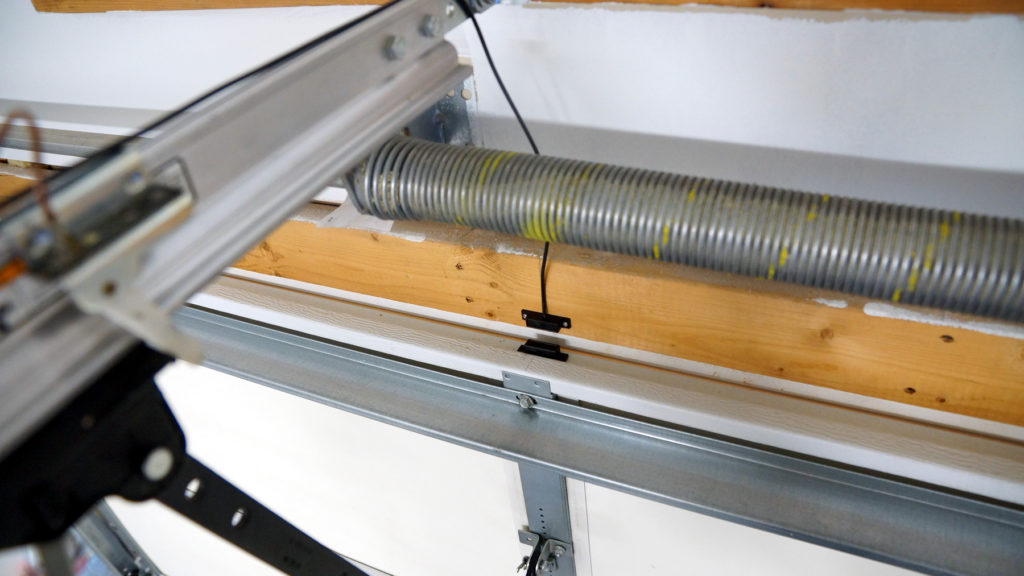
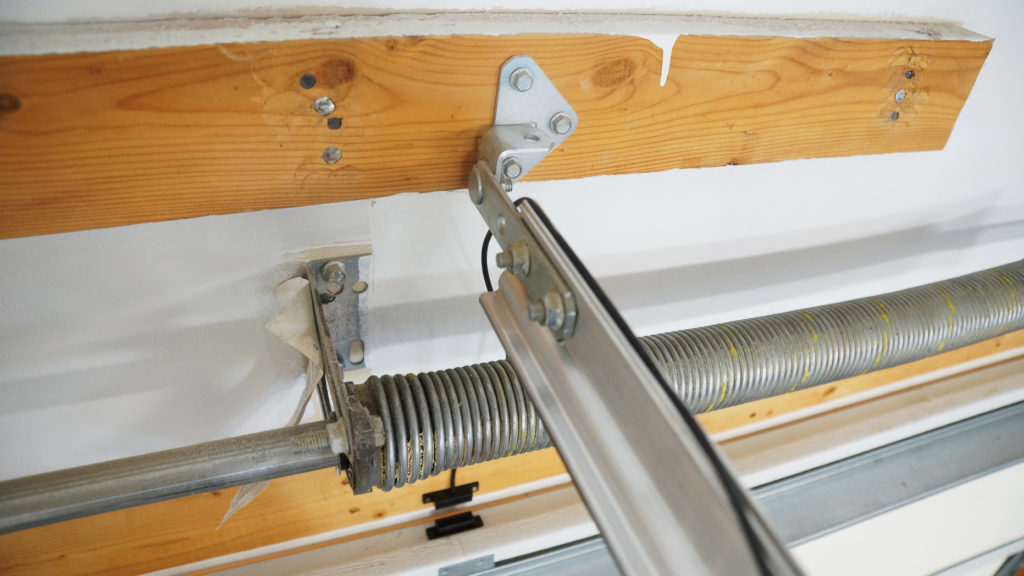
Refer to your garage door opener manual for location of the open/close jumper contacts (just like on the motherboard). Use a rubber-handle screw driver or a copper wire to bridge these two contacts for a brief moment. Usually these points are actual screws, marked as (1) and (2).
By doing this you will send a control signal and your garage door should begin to open or close depend on its current position. And if it does, the test is successful and the smart adapter we’re about to install is 99% compatible with your unit.

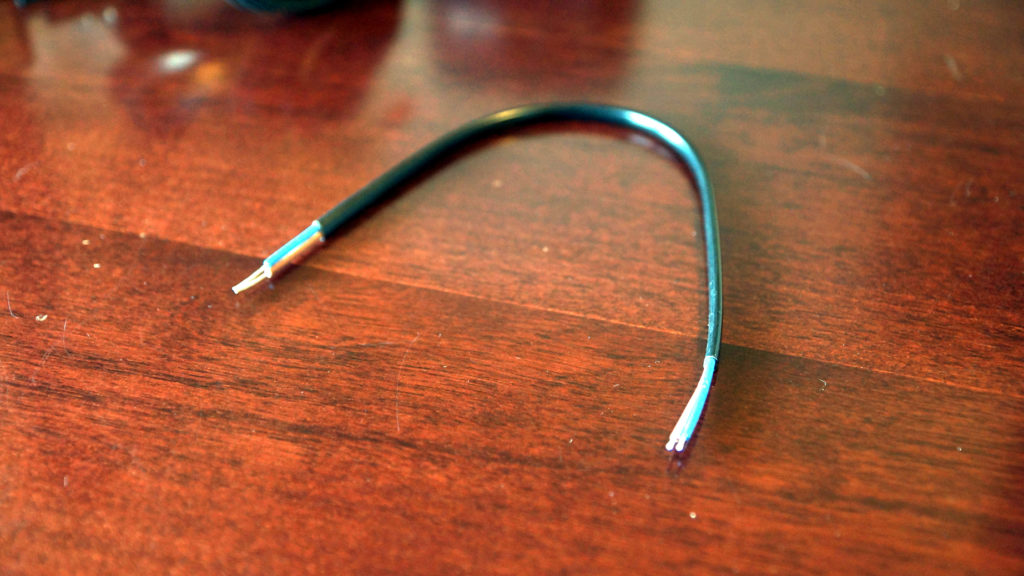
The Meross adapter also includes a white test wire (shown in photo above) that allows you to check for compability, but that’s a step too far into this project to determine whether thing will work out or not. Hence I highly recommend you to check it yourself first so you don’t have to deal with the hassle of returning the product.
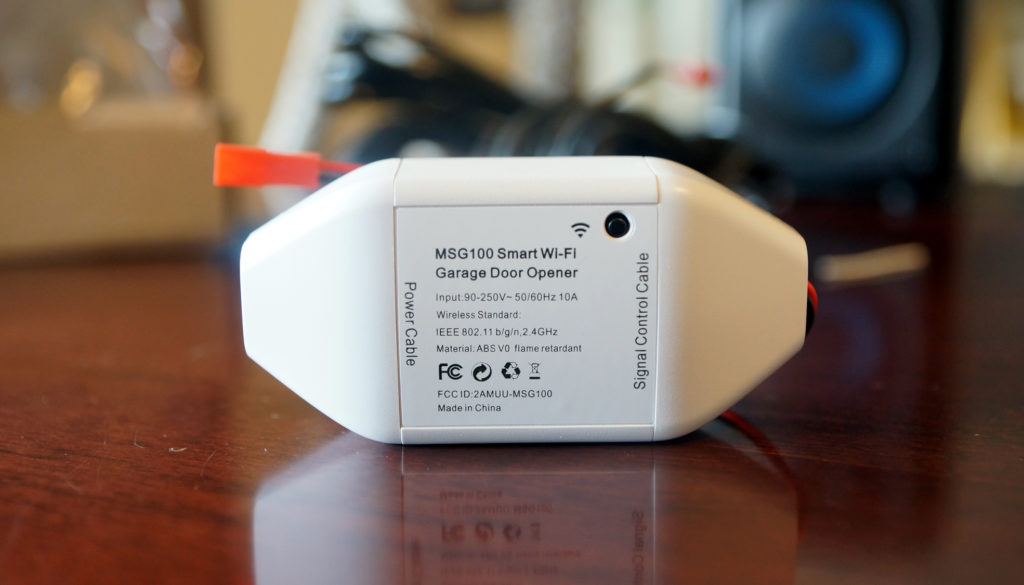
Having a smart adapter with hard-wired signal control cable is a lot more reliable than one that communicates via RF transmitter. I’ll explain more about that at the end, but all you need to know now is this is a very, very good thing and it saves you from so many headaches in the future. The drawback is it might not be compatible with older garage door opener unit, hence this immediate compatibility check is neccessary.
Now if you are super handy and can truly figure out the meaning of life and everything else, there are a few work-around methods explained in the review section of Meross product page on Amazon. Many users have found ways to make this adapter work with incompatible garage opener units, be sure to check that out if it’s your case.
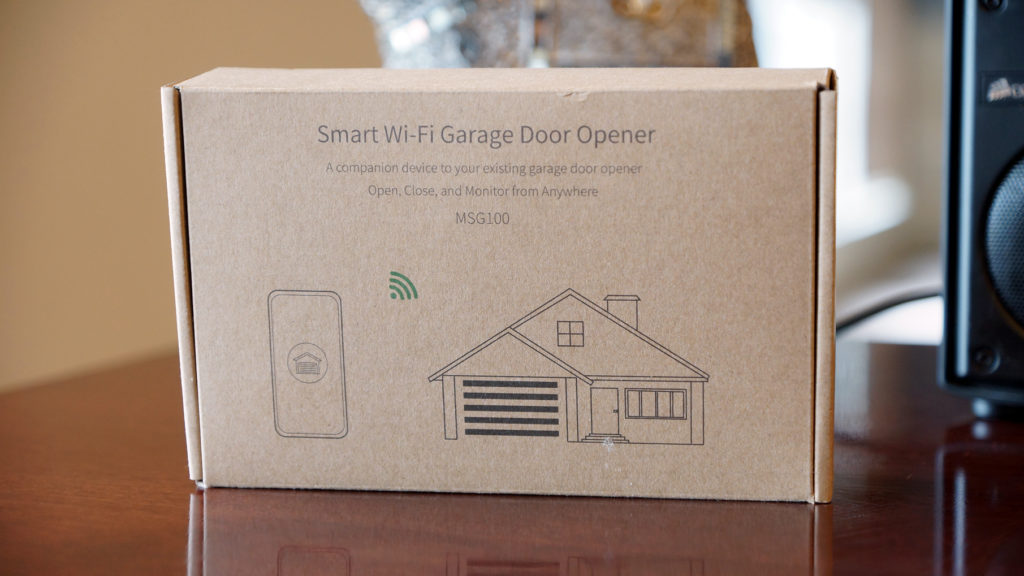
The box arrived a lot smaller than I expected. Not necessarily a bad thing, but I was nervous if something could be missing from such little estate of a package it is.
The unboxing process was extremely fast and uneventful –under 1 minutes even– which I surprisingly enjoyed in comparison to many fancy unboxings we did before.
- Be Smart: Make your existing garage door smart. Remote and Voice Control, just tapping the...
- Compatibility Check: Please scroll down and check in the "Technical Specification -...
- Multiple Notification Modes: Stay alert by different notification modes such as garage...
- Stable and Precise: Meross smart garage opener works with Mediatek IoT chipset that supply...
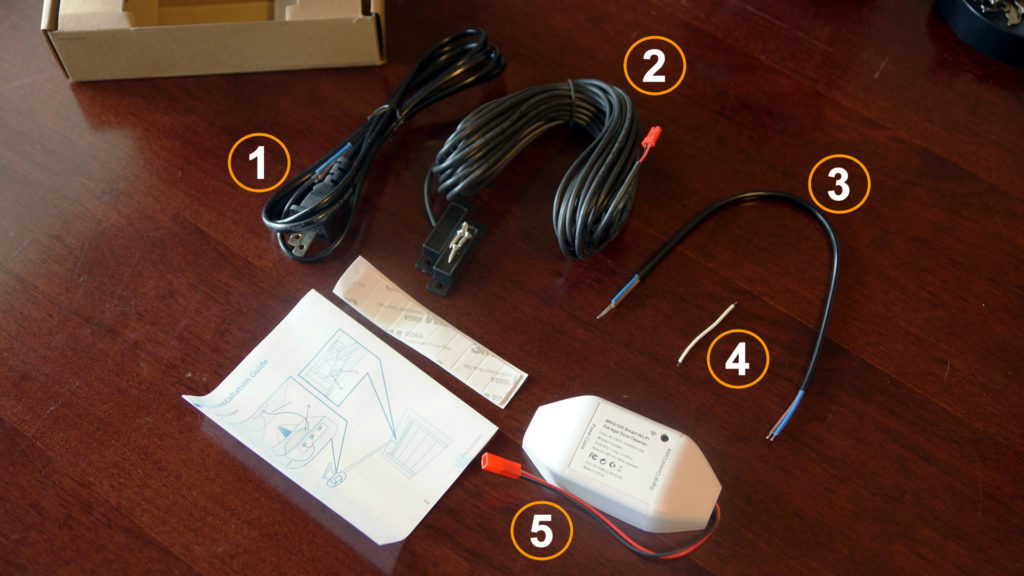
- Power cord.
- Sensor components.
- Signal control wires.
- Compability test wire.
- The smart adapter itself, some double-sided tapes and a single page manual.
*The wire that’s hanging out of the smart adapter ⑤ with a red plug is to connect to the sensor component ②.
A closer look of the sensor component ② which consists of two pieces.
 It’s very similar to a typical window/door alarm sensor in the smart security kit we reviewed the other day. The two parts sit next to each other under normal condition. When they are separated, that indicates the garage door has changed its position.
Meross smart adapter also can remind you if the garage door has been left open for a while and shows the current status in the app; unlike regular security sensor that can only trigger the alarm without providing any additional status.
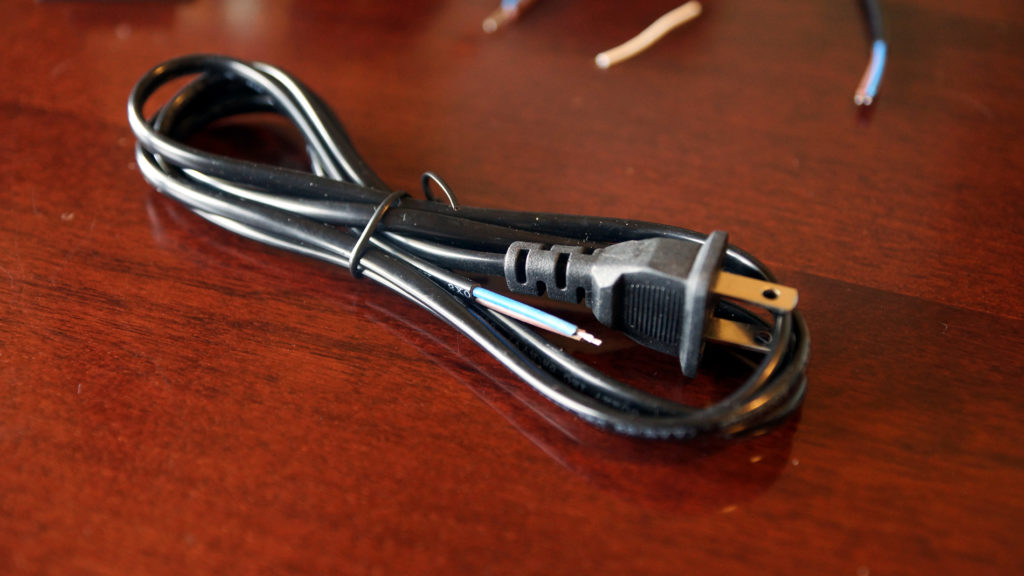
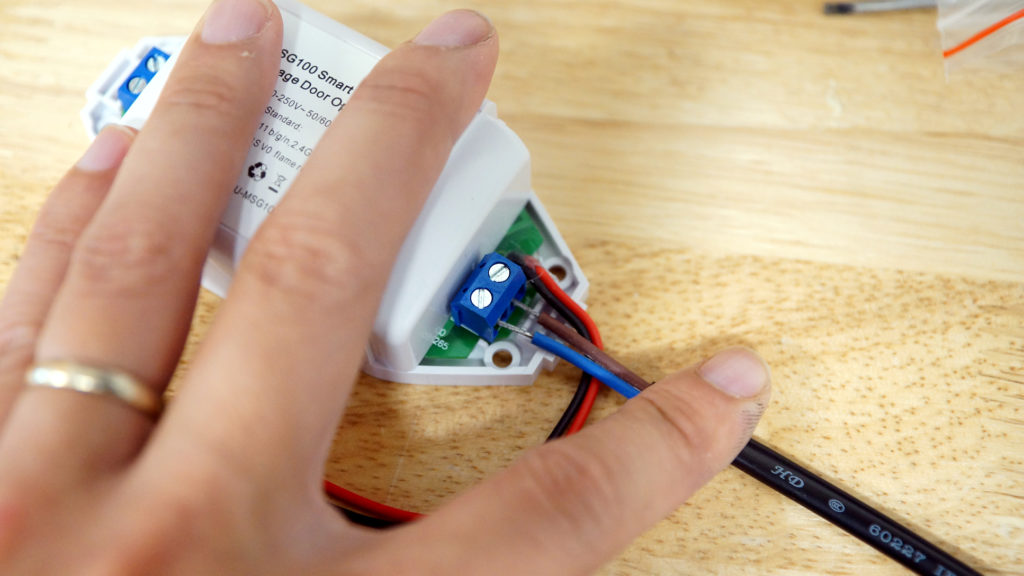
And now we have the closer look of the power cord and the signal control wire. Don’t let the open wires intimidate you, the assembly is very easy and straight forward. Essentially it’s just a few turns of the screws, it shouldn’t take more than a week.
Let’s start with a small flat screw driver and the signal control wire. Open the cover on the side of the adapter where a set of black and red wires come out. Loosen the screws and push the pair of brown and blue wire of the control wire into each separate hole. The order does not matter .
Tighten them securely yet gently, these are very sensitive parts and they may not withstand the power of the mighty Hulk’s screwdriver.
Next, we do the same thing again but this time with the power cord and on the other side of the adapter.
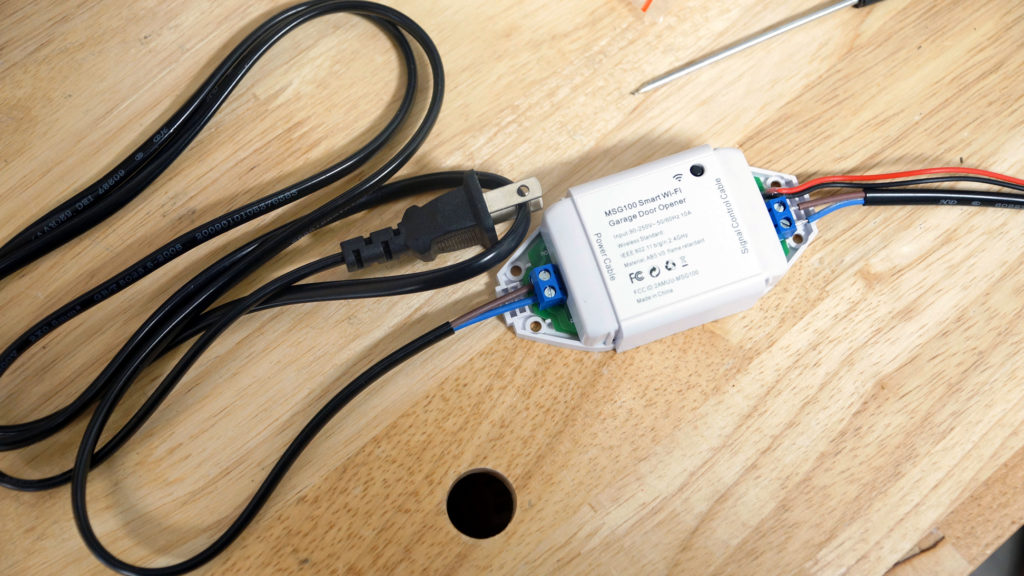
Once that’s done, you can go ahead and power it up for a test drive. You will also need to download the Meross app for your phone now.
I recommend we do this before you spend the next 30 minutes setting it up on the garage door, then find out there is something wrong and you have to backtrack everything. This is a type of lesson I learned from all the road trips when I left the garage door open.
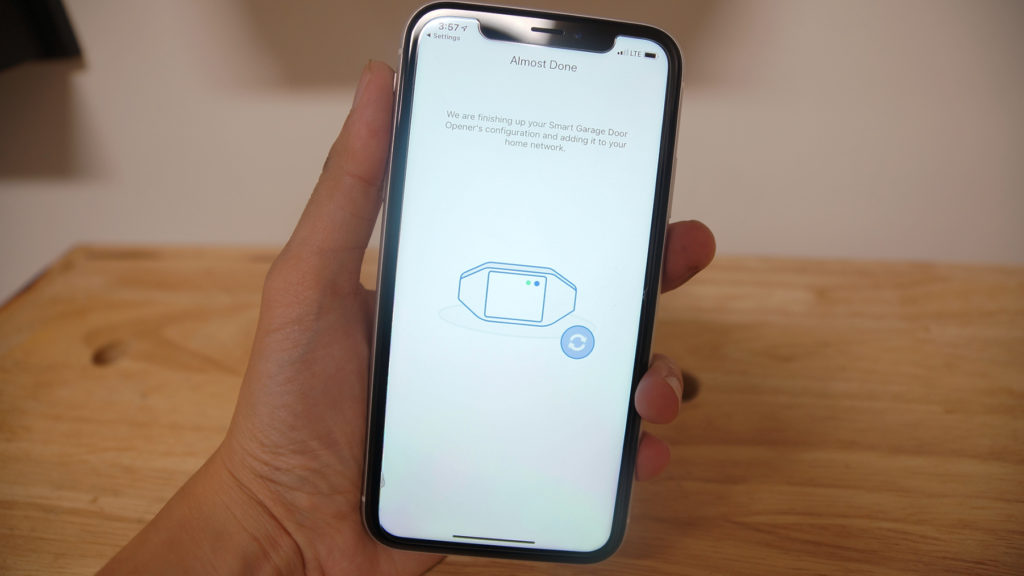
There isn’t much to talk about the pairing process between your phone and the adapter. Meross app makes everything pretty easy to follow and that’s a good thing, unlike Alexa app and the stupid Echo Show 2nd Gen –but that’s a story for another day.
Now once you have reached the final screen, time to get out a ladder and a drill for more serious business.
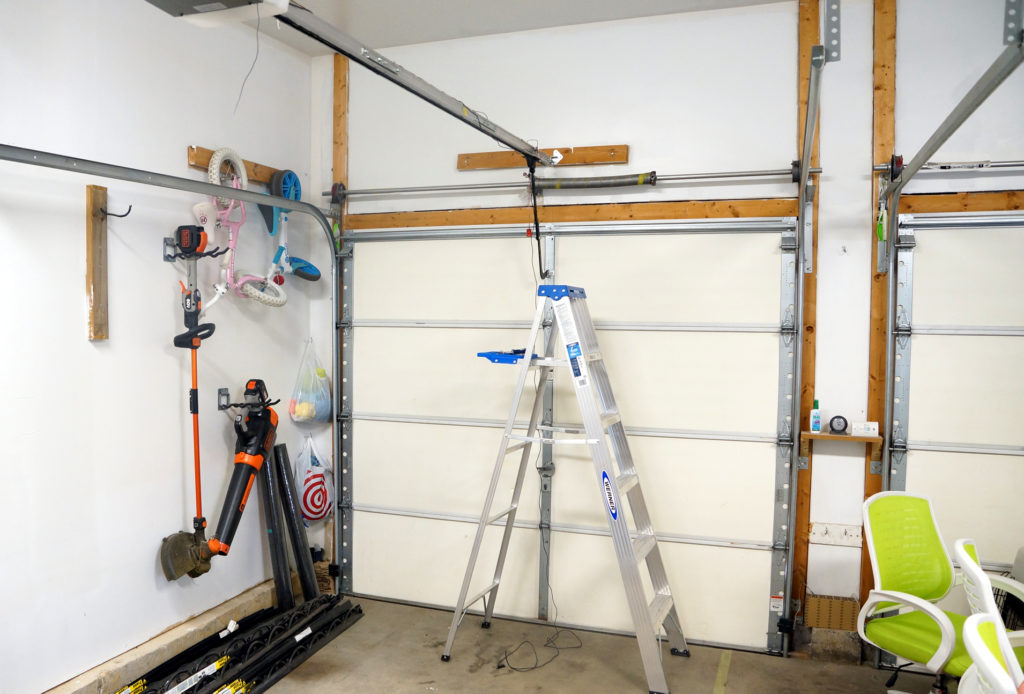
Please pardon the mess, there’s always a construction around here. Life of a homeowner. Anyway, I was afraid the sensor wire wasn’t long enough, but after I laid it out on the railing I realized it’s almost triple the length I needed. So plenty of room to play around. Now go ahead and plug the adapter into the outlet on the ceiling. Once again make sure the app still works fine with the device.
As for the sensor itself, first do your best to find the center line of the door and an open location on top of it. Then screw in the top part to a wood beam, and use the included double-sided tape for the other part where it goes on the garage door.
As the matter of fact, there several locations you can install the sensor, refer to the manual for more info. However I recommend you set it up at the top here so it can be out of sight, dust and out of the way of many moving mechanisms.
The next step is mostly cable management. Fortunately I have some wire retaining clips at the top of the railing which makes things a lot easier. These retainers should be available at your local home improvement store if you need to buy them. You can also use electrical tape if you have one laying around, but those tend to lose adhesive in extreme cold weather.

Before you operate the garage, you must once again open and close it manually many times just to check for any errors. The wire, the sensor must stay out the way of anything that moves. Worst case scenario, you just have to buy a new house.
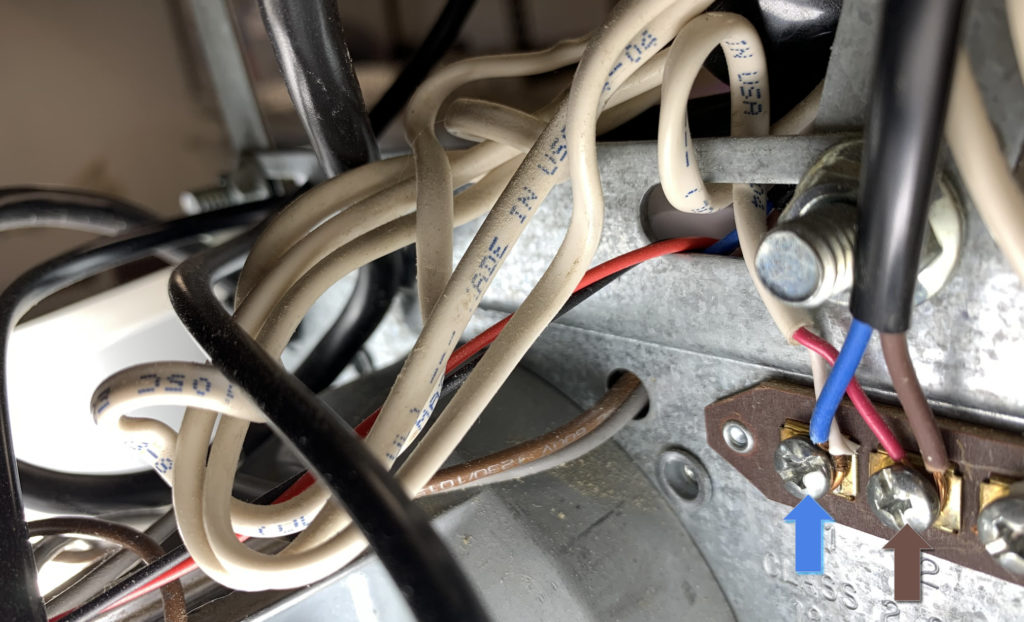
Finally, here comes the most difficult step of this entire assembly. Disconnect all power to both the garage door opener and the smart adapter.
Remember the (1) and (2) jumper contact points that we used to test compability earlier? You have to loosen these screws and let the adapter’s blue and brown signal control wires twisted on each one of the original hot and ground wires. Order, again, does not matter.
Before you get the power back on, connect the sensor wire’s red plug to the smart adapter itself… And we are done here!
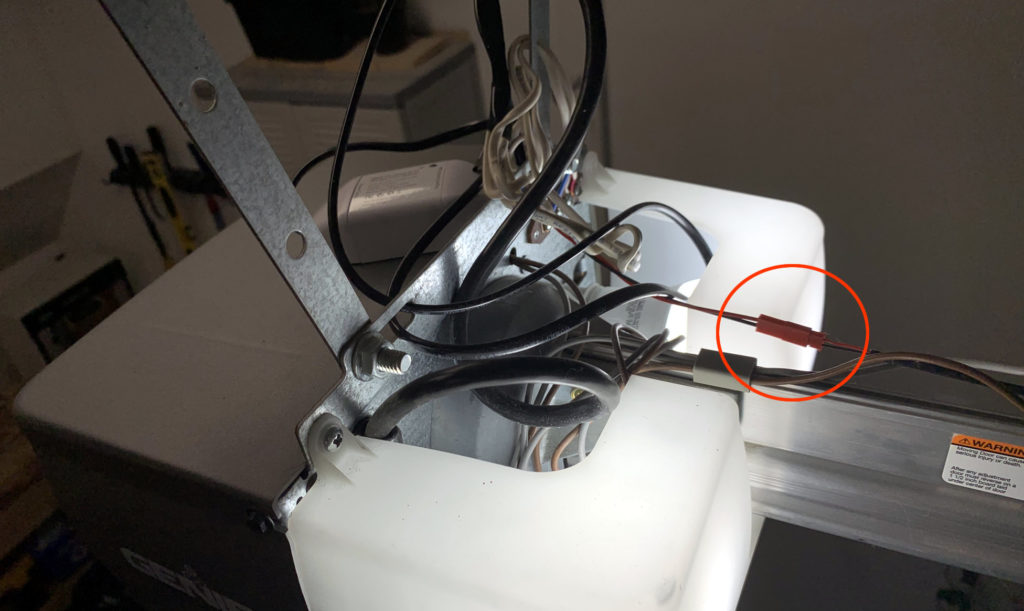
It may not look pretty from the top due to space constraint, but it won’t make much of a different view from below.
However if you got a bit more time, you definitely can do more cable management and it’ll turn out a lot better than my work here.

After months of playing with the Meross smart garage opener adapter, as well as comparing with a few more other similar devices such the Chamberlain MyQ-G030, here’s my quick verdict.
Meross Smart Garage Door Adapter

- Many features packed in a small package. The device itself is a hub so no additional hub required, it just requires a connection to your home wifi network.
- Installation is super easy and the process is nearly hassle-free. You could only realize this blessing when you already tried out other adapters.
- You can add as many adapters as you want, without any hidden fees or potential conflicts.
- Compatible with Alexa, Google Voice, IFTT now with Smartthings support coming in Nov 2019.
- Runs via power from the outlet and not battery. This could be a good thing or bad. If for some reason the adapter doesn’t have continuous power from the outlet then it’s useless without any backup electrical source.
- Sensors are hard-wired which is more reliable, secured and less interference than other adapters that communicate via Bluetooth. When you requests an action, the Meross app connects directly to the adapter itself via your router, so everything is very responsive.
- Reliable. I haven’t had an issue or hiccup regarding connectivity, power outage and auto restart or any of the sorts with Meross’. That has been going on for several months.
- Reasonable price. The NEXX NXG-100b smart adapter that’s essentially the same, costs $80.
- No geofencing. Meaning the adapter does not automatically close the door for you if you are away from home. You can overcome this by using the app as long as there is internet connection.
- Just like any hubless smart things out there, your wifi connection is everything that make or break the functionality of this device.
- No schedule feature available. I’d like to see the ability to auto close the garage door after 2AM, which usually means we forget to close the garage door that night. Though that may pose a risk of someone injuring themselves when thing happens unexpectedly, especially from a moving 130lbs garage door. As far as I know, there will be an auto close feature in the next Nov 2019 update. We’ll see.
- Device itself isn’t strictly bound to an account. I mention this because Chamberlain MyQ G0301 ties itself to an account, like Apple ID and it’s too much a hassle to get rid of.
- No guest access. There is only one admin account for the device which makes it difficult to share with other members in the family. Though you can walk through the registration again to create another account for each person, that’s quite an inconvenience and might cause more security problems in the future.
- Signal control wire is too short. Sensor wire is too long.
Chamberlain MYQ-G0301

- Complicated setup, especially without the signal control cable like Meross’ that is hard-wired to the jumpers. You will have to add the MYQ-G0301 as another RF transmitter key opener, similar to one that you keep in your car. Some garage door opener unit can only supports up to two keys so make sure you have an open slot for the Chamberlain smart adapter.
- Battery-powered bluetooth sensor meaning it’d be extremely inconvenient when it’s out of juice or gets signal interference.
- The Chamberlain MyQ G0301 smart garage adapter recently blocks all third party integrations (Alexa, Google Home, IFTT, Smartthings, etc..) unless you pay for a $12 subscription.
- When you send an open or close command on your phone, the app contacts Chamberlain server, then the server sends a signal to the MYQ-G0301 hub which in turn transmits a RF signal to the garage door opener unit to execute the action. Many hoops, much delay.
- Because the hub communicates with the garage door opener unit via RF, you may have to perform the pairing process again if there is any connectivity issue.
- Same price as Meross smart garage door adapter.
There are several choices, if not flooded in the market, when it comes to smart adapter for garage door opener unit. However, the reason I picked Meross because they have a decent track record, less buggy app and a great customer service to begin with. They are also U.S based hence the chance of some foreign third-world country spying on the status of your garage door is mathematically low.
However with an open minded POV, I believe some of the options listed below may work just as well and could potentially save you more money. Nevertheless you also gotta accept the fact these pop-up companies may not last forever, or they port unpolished app and one day they could just be leaving you on your own. Other than that, you could certainly give it a shot and support a new startup, might it be a gem.

- Be Smart: Make your existing garage door smart Remote and Voice Control, just tapping the...
- Multi-user Access: Share with your families and get notifications at any time, The smart...
- Easy to Install: Installation is much easier than you may think. Pls make sure your 2.4GHz...
- Compatible with most brands of garage door openers made after 1993 that have standard...
Nice evaluation and comparison.
I already have a Meross Garage door opener, but am adding one for our gate, way out front, and searched for any updates.
I’ve had the one for the garage for almost 2 years (?) absolutely love it! Woot had it, i think i paid 22 bucks for it.
I’ve gotten a new hardware one, uses a usb 5 volt for power, so i’m connecting it to the solar gate with a 12v to 5v stepdown.
Anyway… thanks for your review
dave
“Though you can walk through the registration again to create another account for each person, that’s quite an inconvenience”
can you elaborate it?
It’s a long shot, but you basically open another new account and reattach the device to the new account for sharing purpose. The old account still works in our test. But I’d rather see a family share feature like Ring doorbell’s where each family member besides the main account, can gain limited access to the device.