After two full years of preying on the market, my wife and I were finally able to settle on a starter home that we both really love. It has beautiful landscape, roses all around, lot of space for the kiddos, particularly close to Hooters, and most importantly everything was very well taken care of by the previous owner. Everything.
Except a small above-ground pool sitting on the far side of the backyard that looked something like the day I ate too much old guacamole and had notable output. Staring into the abyss of this dark pool at night eats away my very soul, thanks a lot Bly Manor.
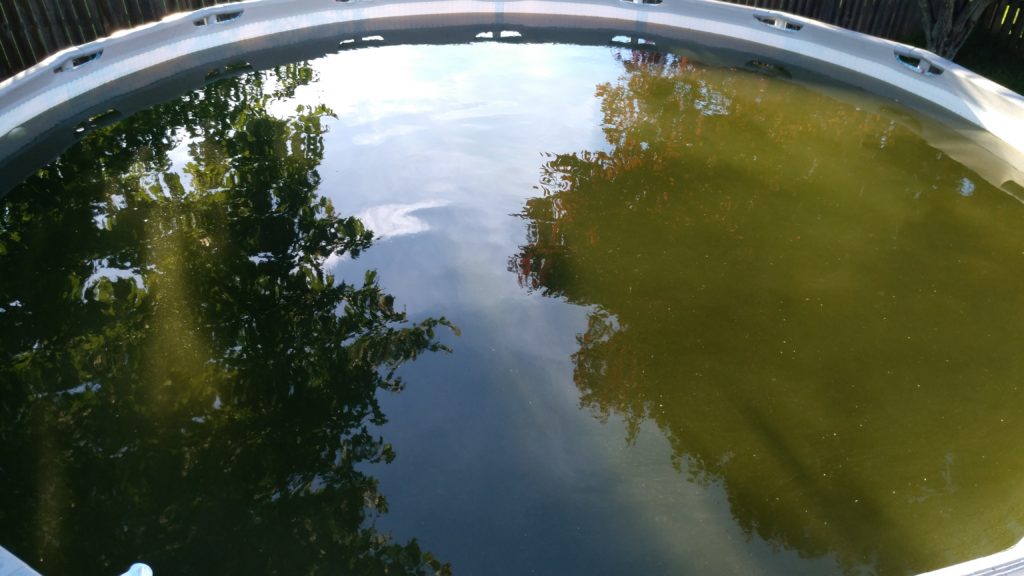
I learned that their kids grew up and the moved away for college, so this pool had been under hibernation for over five years. I wanted to have it up for a few more seasons for the little ones. So in the beginning of May, I took up the challenge of cleaning up this pool with absolutely no clue how to do it. Pretty cool eh? And time also does fly when you have no fun. Just like how the first pandemic lockdown feels like it was just a few months ago.
Anyway, once I was 90% certain that I’m 73.6% finished cleaning up this pool, fall was fast approaching and the snow forecast was incoming next week. Even the birds already started migration. So unfortunately, no one wants to be Jack and Rose in that pool.
To sum it all up, in the first year I sunk nearly $1000 and a ton of time into this crap hole and worst of all, the water wasn’t that clear at the end. Well, at least now I could share the experience so you can avoid all these costly attempts like mine.
Things definitely got a lot better in the year later though:
I – Basic Stuffs
I’m not going to get too crazy with all the terms and chemistry in this article but I’m not gonna sugarcoat them either. Though we are going to keep everything very, very simple –there are some names you need to get familiar with. Perhaps when you have gotten more experience, you can learn more details from other sources online.
In layman’s terms , it means raising the chlorine in the swimming pool to a level that it can mass murder all kinds of contaminants — attacks bacteria, bounds harmful ammonias and nitrates from bird poop, rotten leaves, bugs, etc…It’s an all-in mission.
Easy stuff, just a scale used to determine how acidic or basic the water is. At pH 0 means it’s super acidic and at pH 14, the water is completely basic. In our swimming pool, we tend to keep the pH as close to 7.2 to 7.8 as possible.When I opened the pool the second year in, it was over 8.2 which surprisingly tastes kind of like baking soda mixed with sea water…Don’t ask.

High level of pH makes sanitation (chlorine) less effective and causes red eyes, dry skin for the swimmers. Meanwhile Low pH level, similar to diving in orange juice, causes itching and turns water into a black or brown shade which looks disgusting as sh*t. Low pH also corrodes pump equipment and damages the pool lining.
Now here’s the significant fact. At a pH of 8.0, the chlorine is only 3% effective; and at a pH of 6.0 the chlorine is 97% effective. It is important that you fix the pH level in your pool ahead of time to avoid waste of chlorine, because good chlorine isnt cheap.
 Cyanuric Acid. Crazy stuff. There are hundreds of controversial topics about this so called mysterious water conditioner or chlorine stabilizer.
You see, ultraviolet ray from our sun burns chlorine like vampires wakes up in the morning, which wastes all the expensive chlorine you throw into your pool. CYA is like a sun screen lotion, attaches itself to your chlorine and shields chlorine against the sun.
Having a decent level of CYA in your pool, which is around 30 to 50 ppm, helps prevent a significant amount of chlorine loss throughout the day –especially in the summer.
However, too much CYA will attract all your chlorine and none of them will bother to do the works, which is to kill bacteria and algae. Too little CYA and you will end up just like me, wasting almost a thousand of dollars in chemicals with no worthy result because they are burned up too fast.
The good thing is you can increase CYA level pretty easily.
The bad thing is if you have an excessive amount of CYA, draining the pool is almost the only solution to reduce its level in a timely manner. Though CYA tends to go down a bit every season due to spill, leakage and rain but it’s definitely not happening next week before the upcoming house party.
Basically bleach. Not typical household bleach though. Much stronger stuff.
There are all types of chlorine options when you walk into a home improvement store or swimming pool shop. They typically come in three forms –granular/tablet or liquid. There are several kinds of chlorine in granular and tablet form, but the most commonly used by home owners are Calcium Hypo, Trichlor and Dichlor.
1 – Calcium Hypochlorite aka Calcium Hypo
This is a very powerful chlorine, often used to shock your pool. Besides the granular form for fast dissolving, it also comes in puck or tablet size for regular maintenance.
I mainly use Calcium Hypo to jump start the pool in early spring if I can’t get my hand on liquid Sodium Hypochlorite (more onto that later).

Note that even the two bags in the photo above are both Calcium Hypo, they have different percentage of available chlorine . Drytec contains 65% concentration while the HTH counterpart only has 54%. I bought Drytec at a local Ollie’s store for only $2.49 each. I spent so much money on HTH bags so I was really happy when I found out Drytec.
Another granular Cal Hypo with similar concentration to Drytec is by In The Swim below, sold on Amazon for $3/pouch.
Now before you are buying hundreds of these, you must also be aware that Calcium Hypo increases calcium hardness in your water. It adds 7 ppm more per full bag.
2 – Trichloro-S-Triazinetrione aka Tri-chlor
Trichlor is a cost-efficient chlorine and mostly available in both granular and tablet forms. You can get it at all major home improvement retailers.
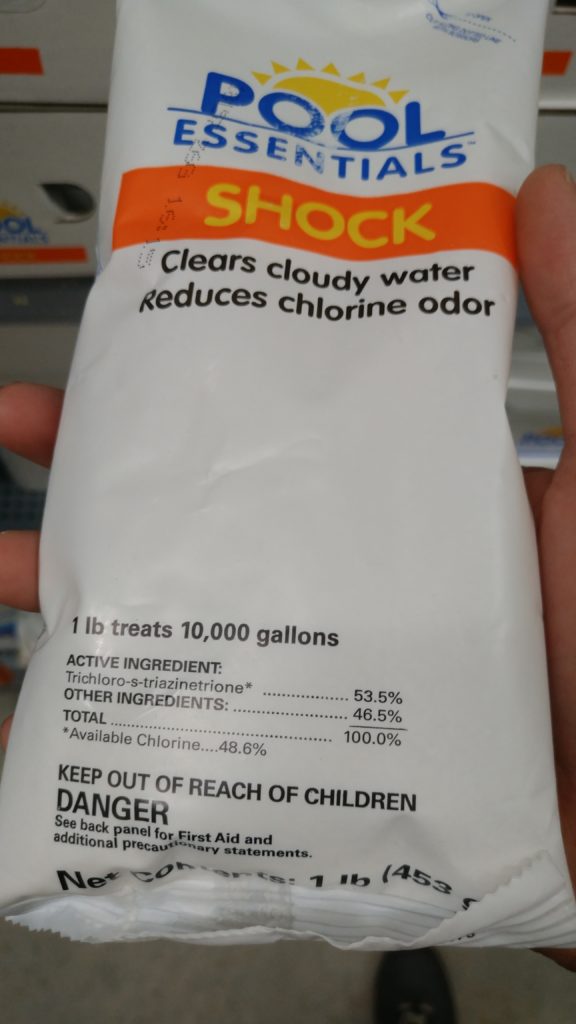
This is a good type of chlorine when used as a maintenance agent, e.g tablet form. In granular form, every one lbs bag of Trichlor dumps 6 ppm of CYA into your pool, as opposed to Calcium Hypo which dumps calcium.
Too much CYA renders chlorine ineffective, hence Trichlor is a tricky catch 22 when applied alone.
On the other hand if your CYA is super low, Trichlor is perfect to gradually increase CYA level for your pool at an affordable cost. It’s best to keep a keen eye on the CYA numbers when you are using Trichlor and Dichlor or else you are gonna have to drain the pool to balance the CYA level.
3 – Sodium Dichloro-S-Triazinetrione aka Dichlor
This is known as the lesser and the cheapest tablet/granular chlorine you could find in the market. They often comes in 5-gallon bucket in many wholesales stores.
For every one bag of Dichlor used, you add 10 ppm of CYA into your pool which is a lot worse than Trichlor.
4 – Sodium Hypochlorite aka liquid bleach
You have learned that most granular chlorine always affects the water in one way or another. Calcium Hypo increases calcium level, Trichlor and Dichlor increases CYA.
If you want none of that, it’s time to use the best of all worlds –sodium hypochlorite.


First don’t get confused with typical household bleach found in local supermarket. Those often only have 5-6% of available sodium hypochlorite.
The jug in the the photo above contains 10%, nearly twice as much and it’s one of the best chlorine concentration you could find for $2.99 each. I got a few packs of them from Ollie’s that last all three seasons.
Liquid bleach does not add large amount of side chemicals (except a small level of saltiness) to your pool and it works extremely effective. The drawback is they are stored in bulky bottles which takes up a lot of space if you buy in large quantity. The saltiness may also cause random mood swing, happens to any pool.
Most public swimming pools have this very strong “pool smell” and a lot people think it’s the chlorine and because the pool is well sanitized. Quite the opposite!
Chlorine when properly measured and applied in the pool should have no smell.
On other hand, chlorine that lives long enough to see itself becomes the villain aka chloramines, or Combined Chlorine –is bad. This is because lately it’s been hanging around with urine, sweat and body lotions and many other yucky stuffs.
If there is more chloramines means there is less real chlorine available to sanitize the water. So it’s a bad thing and causes the smelly smell that you smell; partially thanks to ammonia. So to get rid of chloramines, we simply need to add more chlorine to destroy these fallen angels altogether.
Some test kits like the one I recommend below allows you to measure the actual amount of real chlorine (aka Free Chlorine or FC) to combat both chloramines and other shits. Cheaper test kit usually only lets you measure the Total Chlorine which is a sum of both chloramines and chlorine level leaving you in a blind spot. In such case, it’s a lot harder to determine the right amount of next chlorine application you will need to add to oxide everything.
II – Getting Started
Alright, enough with all the lesson. Let’s see how we can turn this pool around.

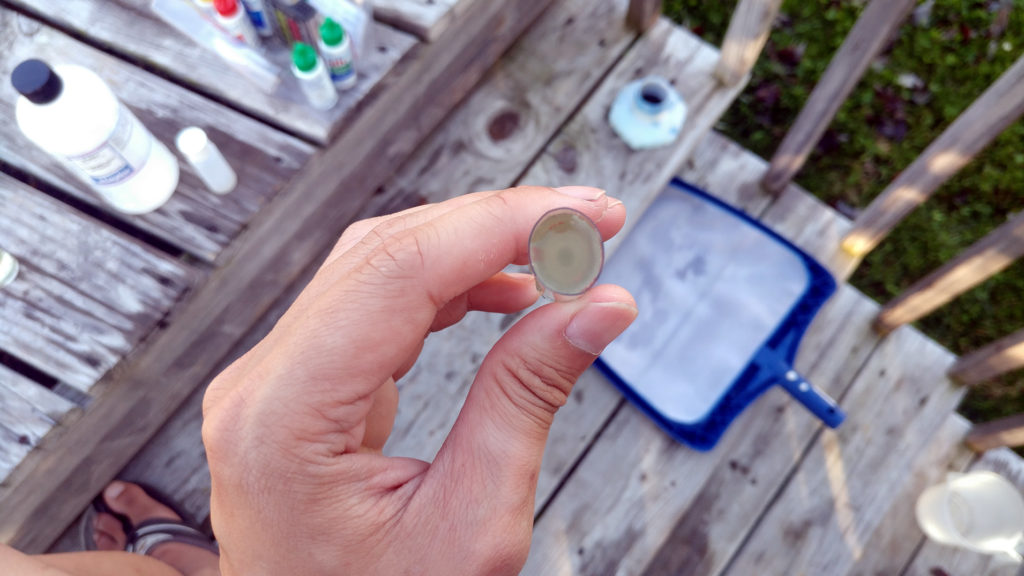
First you should buy the Tailor water test kit and some cleaning equipment.
Don’t bother with the test stripes, they are often inaccurate. You need to know your water like the back of your hand and what’s going on in it, so do not skimp on a good test kit.


In most case, you will be required to mix pool water with a solution to fix an unbalance in the water. Prepare yourself a bucket ahead of time for smooth sailing.
Once you got all your tools and kits ready, the next thing to do is start cleaning the pool. Get your net and remove as much dead leaves, dead bugs and all other kinds of debris from your pool.
You can always pay a neighbor kid and have him do the works if he’s up for it.
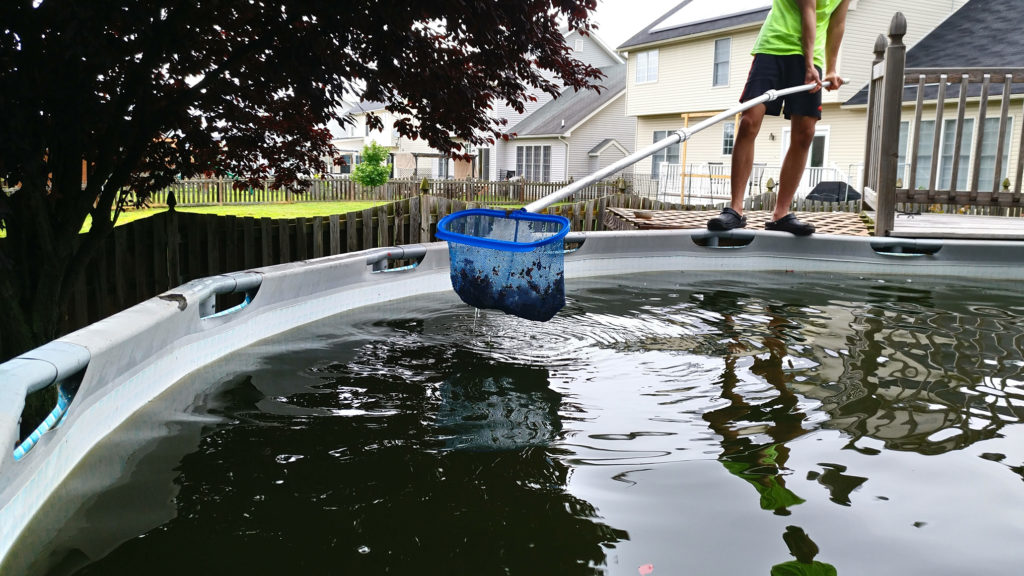
This process should take at least 2-3 days. It’s not easy work and you must see it through carefully. Perhaps it is the most important step pool owners often overlook. When you think you are done, give it a dozen more scoops. Also use a skimmer to remove smaller objects that the big net missed.


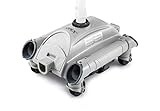
Next, it’s time to set up your filter and vacuum equipment.

You will be surprise how much crap the vacuum head picks up at the bottom of the pool. You probably have to clean the debris bag more than 10 times every 30 minutes.

If you have limited time working on the pool, try an Auto Pool Cleaner. Check out the video in one of the Amazon reviews to see how it works.
…And this day will be a mess. Guaranteed.

Don’t throw away dirty filter cartridges. Clean them and reuse. Replace only when your pool water starts to clear up.


III – Test the Water
Once you know that most unwanted objects have been removed from the pool, it’s time to learn your water.
Bring forth the test kit, follow the instruction and write down every result on a piece of paper. If it is your first time you will need to see all levels of pH, Calcium, Alkalinity and CYA before any use of chlorine.

| pH and Alklinity | |
| Too high | Use Muriatic Acid or pH Down to lower the level. Buy from Lowes/Amazon. |
| Too low | Use baking soda to increase the level. Buy from Walmart/Amazon. |
| CYA | |
| Too high | Drain pool and refill or wait several months. |
| Little low | Use Trichlor chlorine to shock pool and at the same time it can raise the CYA level gradually. |
| Too low | Use pool stabilizer. Buy from Walmart/Lowes/Amazon. |
IV – The Fun Part
When the level of Alkalinity, Calcium Hardness, pH and CYA are all within range, now you can dump chlorine into the pool and watch the awesome changes in water happening right in front of your eyes.
| Pool chemistry – Recommended levels | |
| Alkalinity | 60-120 ppm |
| pH | 7.2-7.8 |
| CYA | 20-50 ppm |
| Calcium Hardness | 200-500 ppm |
You may need to add 3 gallons of liquid chlorine or more depends on size to shock the pool for the first time. It’s recommended to add chlorine in a mild afternoon when it’s not too sunny or too hot. This way, you will still have a high level of chlorine going in the evening and allows sanitation continues to happen overnight.
In this photo, I start adding chlorine around 4PM. To determine the accurate dosage of chlorine for your pool, refer to the Shock/Maintenance FC chart in section V below.
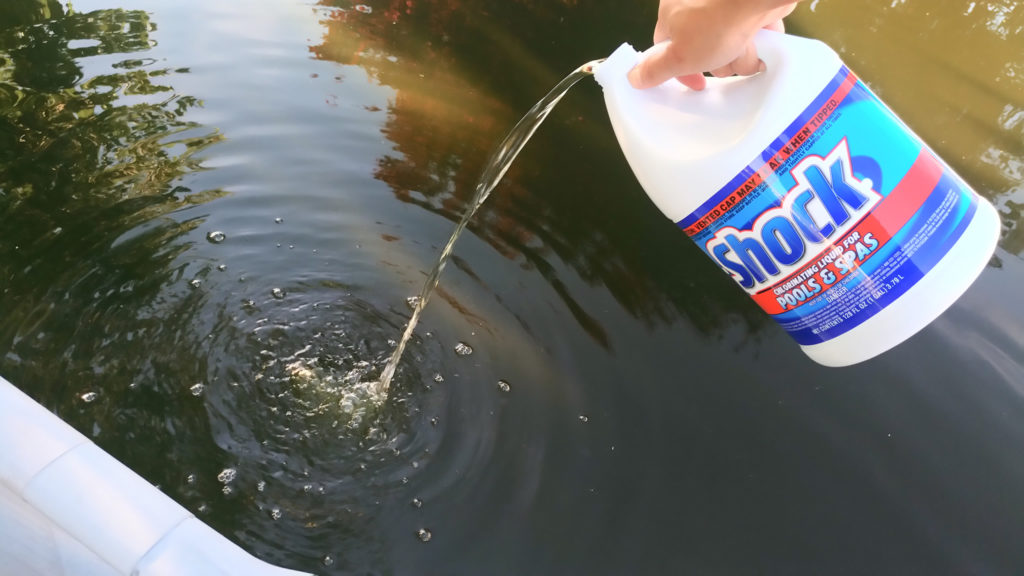
Immediately after the dosage, take the brush and start scrubbing everywhere in the pool.

Algae have their own defense mechanism against chlorine so by scrubbing the surface of the pool liner you break this shield and they get eliminated a lot faster.

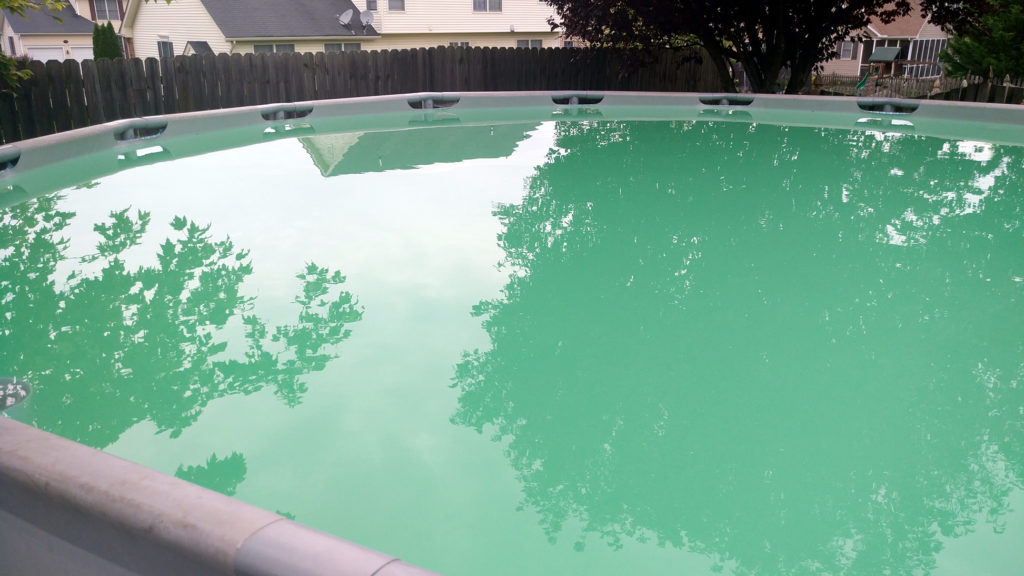
As you brush the pool, you will also notice the change in water color.

It will also start to foam up very quickly. This is about an hour after the chlorine application.

The next morning it will start to brighten up slightly, but you won’t be able to see the bottom just yet. Just keep the filter running non-stop and wash the cartridges as often as possible. A decent filter, better than a bad filter, will speed up the progress tremendously. Believe me.

Test the water again.

Upon reading the result, I find my chlorine level is a little low. So I decide to use one application of granular Cal Hypo chlorine to bring the number up. This is in the afternoon of the second day. You can continue to add liquid chlorine if needed.
If you use other types of chlorine applications, make sure you keep track of their side effects as I talked about them early.

Now, clean more. You also need to keep stirring the water at this point just so dead algae does not have a chance to settle at the bottom and instead get sucked into the filter.

A couple hours later. It’s very hard work but it shows. Remember, every piece of debris counts.

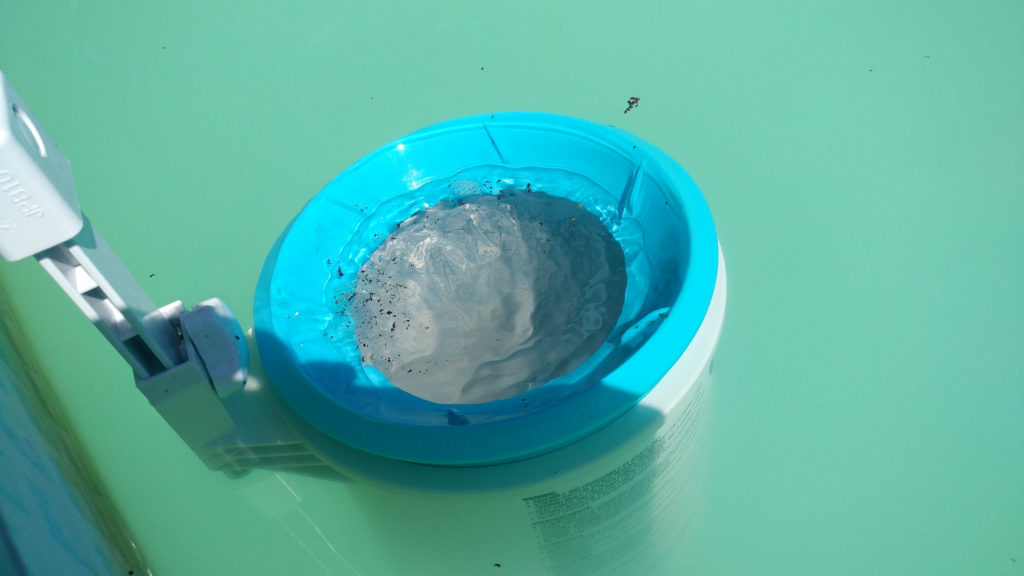
I just finished washing the filter cartridge. If it is in bad condition, this is the time to replace with new catridge. The photo below is taken four hours later.
The next day, I have to dump in more liquid chlorine due to the chloramines level was going a little too high. Not much more cleaning at this point. Just make sure you wash the filter cartridge twice a day.

This is before nightfall. Note that I have also added a float with tablet chlorine to start off the maintenance rountine.

Early morning of the fourth day.

I added the leaf skimmer to make life easier. You don’t have to if there are not a lot of trees nearby, but more often than not you will be glad you have it running.
Things start to look a lot better in the afternoon. I never used any water clarifier during this process, but you may need it if you are in a rush. In my experience, I think it’s waste of money.
![]()
Though I can see the bottom of the pool now, the water is still cloudy upon closeup. There is visibility of algae on every sidewall of the pool so I brush and vacuum for a couple more hours.

The chlorine level has been kept high all this time. However, I stopped adding more chlorine at this point and let the filter works its magic. Once shock level is reduced and dead algae are out of the pool, water will clear up very quickly.

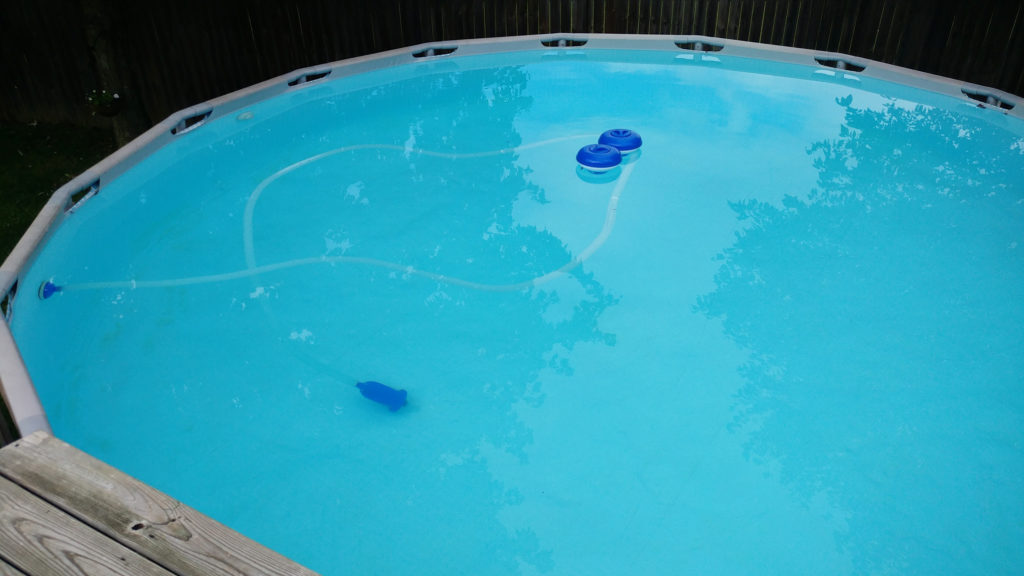
The fifth day brought a bad storm to my area, I could not check on the pool due to heavy rain all day long. This is the mess I gotta deal with on the sixth day. But LOOK! The water is super clear!

I have to remove the leaf skimmer and reattach the vacuum head to clean up the bottom. But the swimming pool cleaning process is finally coming to an end here.
The maintenance part which is a lot harder, is yet to come..haha ha *nervous laugh*
As you can see, there is still some sign of algae but the chlorine tablets will take care of them overnight.
The water should be perfect within the next couple of days after the filter had done its job. Not bad for a week of works, compared to my 4 months of struggle with this pool a year ago.
Keep in mind it may take you a little longer if you don’t keep track of the free chlorine level or did not remove debris out of the pool thoroughly.
You must make sure your free chlorine is high enough and debris are removed as much as possible to finish with a success. Otherwise it will be a very long and tiring battle. I went from spending over $1000 for supplies before to just $120 now to keep my pool clean and clear all season.
V – Advice and F.A.Q
1. HELP!! My pool was beautiful yesterday but it all greened up overnight oh mygod…
 You are losing the battle against algae because the free chlorine level is insufficient and maybe also because you had the pool party the day before when a lot of foreign stuffs were introduced to the water.
Algae bloom also happens fairly often during summer time when the sun is at peak level and burns off chlorine too fast.
First before you do anything, test the water to make sure the parameters are in still in acceptable range.
Next, you need to perform another cleaning and shock. It doesn’t have to be as aggressive as the first time but if you neglect any step, it will be back to the beginning again.
Instead of a whole gallon of bleach, I probably use just half and scrub away any visible culture of algae as much as possible. During summer season I run two floats, each carries a chlorine tablet for slow release. They maintain a very good level of chlorine throughout the week without requires a lot of my attention.
2. How often should I run the filter?
During shock, let it run continuously for several day. After that, you can set a timer for 6-7 hours per day.
Nonetheless, you should wash the cartridge as often as possible since it is the perfect breeding ground for a surprise algae bloom.
3. Did you really spend over $1000 cleaning this pool or you’re bluffing?
- I started out with a Clear Balance bucket and did not know anything about pool water chemicals. This alone is $30 and I was hoping it would correct all water problems. Did not.
- Pool tools were bought right after that and they were about $50 for pole, net, skimmer net, surface skimmer, vacuum head and tablet floats.
- Next I bought 2 bags of HTH granular chlorine for $29.99 each (6 counts x 2). That’s another $60. Unfortunately it did not stop there. I didn’t clean the pool well enough and on top of that CYA was too low, chlorine if was not burnt off by the sun then was busy attacking leaves and debris instead of killing algae. I did not know. So another 5 bags over the course of four months bring the total expense to $210. I still never completely won the battle against algae the first year.
- I also went through filter cartridges like a supercharged V10 drinking gas. I thought these cartridges are one-time use so they should be replaced bi-weekly. One pack costs $11 and comes with 3 counts that last two weeks. That’s roughly $90 total.
- Then I learned about pH, CYA, Alkalinity, Calcium Hardness. The first water test kit was $35 and was used up very quickly. So I had to buy another one in the middle of the season.
- I also bought all kind of solutions to fix up the water: pH Up ($8), pH Down ($8), Water conditioner ($15), Algae shield ($12), Water Clarifier ($10). Gone another $90.
- I also bought a $149 Solar Ionizer that colored me impressed. It released positively-charged copper ions which is deadly to algae/bacteria but harmless to human when used under direction. As the result, I no long have to buy a ton of Chlorine the battle against algae, Chlorine then only be applied for weekly shock for disinfection if needed. The drawback is when you leave the device in the pool for months, it will stain the liner due to the significant raise in copper level –it’s best to first completely clear the pool of all algae then follow 2 weeks on, 1 week off schedule.

- Electricity cost for running the filter with seldom stops for four months turned out to be a little over $100.
- Towards the end of fall, I began to get the hang of the works and I switched to liquid bleach. I bought 5 cases for $40. I also started to use tablets for slow release and they cost $10, comes in a jug. But they were all wasted because it was too cold to swim at that time.
So far you can see I spent $800 in supplies alone. Here’s the kicker, the man hours I put into cleaning up this pool costs far more anything I bought for the pool. It’s easy in $2500 range if I used those hours to write you guys more questionable reviews and if the big boss would pay me on time. So there you have it. Very costly chore. 2.6/7 would do again.
Somewhere along the line I learned that the best and most affordable way to enjoy a pool is having a friend who has a pool.
4. How much chlorine do I use?
For shocking the pool, a lot. Check out this chart.
| CYA Level | Free Chlorine (Shock) | Free Chlorine (Maintenance) |
| 30 | 12 ppm | 2 ppm |
| 40 | 16 ppm | 3 ppm |
| 50 | 20 ppm | 4 ppm |
| 60 | 24 ppm | 5 ppm |
| 70 | 28 ppm | 5 ppm |
First test your CYA level, then wait until late afternoon and start dumping chlorine in the pool to raise the Free Chlorine level to the match the chart above.
If your CYA is below 20 or above 70, it is a waste of chlorine and money. You must drain and refill the pool if CYA too high. You can buy CYA stabilizer if the amount is too low.
5. How do I know the correct dosage of chlorine I should use to raise the ppm level?
Use this calculator. Simply apply geometry to determine the volume of your pool first, then just plug the numbers in.
For example, upon opening my 6000 gallon pool has zero FC. It has a CYA measured at 60 ppm, so according to the chart above I’d need to raise FC to 25 ppm. I input these numbers to the calculator and as the result, I need to use 149 oz of liquid bleach with 10% concentration –just a little over one jug to shock this pool. However, I often add slightly more to account for any leaves and bugs that were not completely removed in the first place.
Do you ever use baking soda instead of the chlorine stabilizer?
Yes, then my wife said something about baking supplies and I blanked out and now I cannot use baking soda anymore for some reason.